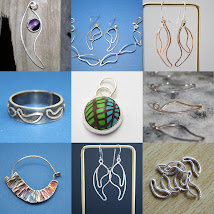
 These are the silver rings previously seen as work in progress. The plain one came up nicely after tumble polishing, and I'm now motivated to make one or two more to wear with it. The cross hatched texture on the other was done by hammering, and I'm delighted to have rescued something from the horrible mess I'd made with earlier melting disasters!
Wednesday 31 October 2007
Ring changes
 These are the silver rings previously seen as work in progress. The plain one came up nicely after tumble polishing, and I'm now motivated to make one or two more to wear with it. The cross hatched texture on the other was done by hammering, and I'm delighted to have rescued something from the horrible mess I'd made with earlier melting disasters!
Sunday 28 October 2007
Crafting Beauty in Modern Japan
 I visited the Crafting Beauty in Modern Japan exhibition at the British Museum about ten days ago. There was no jewellery, but there were some large metalworked items incorporating inlay and hammered finishes. The item that inspired me most however was one of the kimonos. From a distance the pattern looked a bit like an array of CDs catching the light. Close up though, you could see that these patterns were made of radial strips of deepening tone.
My interpretation of the pattern, generated using Paint Shop Pro, is shown here. Click on it for a larger image.
Details of the kimono: Melody (Senritsu) 1968, Matsubara Yoshichi (born 1937), Indigo stencil dyeing on silk. There are pictures of it here and here (At the second link, use the Next button 5 times to reach the correct picture).
The shapes reminded me a little of fold formed items I've seen when looking into 3D forming. I now wonder if one could achieve an effect similar to the shading by hammering and oxidation.
Thursday 25 October 2007
Moo card holder
 I love all the tutorials that are available in blogs! I followed this one, from designverb to make these neat little holders for Moo mini-cards. The one at the back of the picture, like those in the tutorial, is made from a couple of the cardboard colour swatches you can get in the DIY superstore to help you decide on paint colours. The other one is an original breezily watercolour swatch. It will be rather less robust, but I think it looks good! The swatch patterns remind me a little of some of the designs for resin and silver jewellery at the sites I listed in a previous post.
 There are two templates provided in the instructions, one for standard business cards and a custom template. I used the custom template, and scaled it to 75% to make the holder suitable for moo cards.
Tuesday 23 October 2007
Resin and silver jewellery: three websites

Lulu Smith (www.lulusmith.com). Beautiful, simple shapes and strong colour. Gorgeous!
Anne Schilk's Swirl range features dramatic concentric circles, and fine colour combinations. (www.anneschilk.com/page13.html)
Miriam Arentz Stunning, striking pieces with coloured resin behind graphic flower-shaped windows in silver.
(http://www.miriamarentz.de/eng/schmuck.html).
Saturday 20 October 2007
Re: Planishing
 I'm already quite taken with planishing - it doesn't involve as much cleaning as chasing and repoussé and you get to a pleasing surface quite quickly.
 This is my copper learning piece, it is going to be a little bowl. We started with a wooden bossing mallet, and hammered against wood to get the concave shape. The shape was refined on a sand bag. The surface is a bit bumpy at this point.
 Then, after annealing, we started to smooth the surface using a planishing hammer on a steel stake. Will be returning to this in two weeks time (there is no class next week).
Wednesday 17 October 2007
Percy the Repoussé Polar Bear
 We continued to learn chasing and repoussé this week, working on our tutor's original demonstration piece, which was going to be a leaf. After our first, inexpert bashes on the back of the piece we could see an animal taking shape, was it an elephant or a rhinoceros? No, it's a polar bear! So, we changed the outline a bit on the chasing side, and Percy the Polar bear emerged. Click on the picture for a bigger view if you can't make out the shape.
 There's an awful lot of cleaning involved with this technique. Here's Percy after the excess pitch has been heated off, but before the rest was removed with a brass brush. The rainbow colours are nice though.
Sunday 14 October 2007
It's a sine
Saturday 13 October 2007
First Work in Progress post
 The photo shows two works in progress. The narrower ring is made from 3 mm x 2 mm D-shaped silver wire. It is a warm-up piece to help me get used to soldering again. It needs a bit more work with wet and dry paper before tumble polishing. I am planning to make a stack of rings, and this will be one of the set. The wider ring was started several months ago, but I had difficulty soldering on the setting for a cabochon, and melted the surface. I have come back to it and am tidying up the damage. I'm thinking about omitting the stone and adding a hammered texture to the surface.
Thursday 11 October 2007
It's a rollover week
 We have started to learn the processes of chasing and repoussé via a demonstration at the evening class. The best gauge of metal sheet to use for this is between 0.5 mm and 0.7 mm. We found one piece of copper sheet the correct thickness, and this is being used in the demonstration. Unfortunately we couldn't find any more, so we are using the rolling mill to thin down thicker pieces for our own work. Have done 3 anneal/roll cycles so far, and there is still some way to go!
 For those not familiar with chasing and repoussé: the metal is shaped from front and back using steel punches, while it is supported by a slightly elastic supporting surface made from a mixture of pitch, plaster of Paris and tallow. Very traditional. I'll take along my camera next time and get some pictures for a future post.
And the reason for the photo? According to Wikipedia, the Statue of Liberty was formed using repoussé. They must have had a big bowl for the pitch ...
Monday 8 October 2007
Instant collage
 Thank you to How about orange for introducing me to this wonderful time waster! You upload a single picture to the Hockneyizer, and it makes a collage. There's a choice of styles, and you can shuffle the component pictures repeatedly until you get an arrangement you like. Quite addictive ...
Sunday 7 October 2007
Celtic knots and origami paper
 This pretty little pendant is made from Japanese origami paper; I bought the pendant from this Etsy seller. I made the necklace myself, it is a four-strand plait as seen in Celtic Knots for Beaded Jewellery
Friday 5 October 2007
Brief number 1: Origami with metal
 The brief title is actually 3D Forming!
Here's the first bit: By exploring the various techniques of metal forming you will create a piece of jewellery with a 3D form. You might want to use planishing, chasing, repousse, fold forming, hammering and the rolling mill in order to form your metal...
So, I'll be doing a bit of web searching to find designers using these forming techniques - three of the websites will appear in a future Inspiration post. I'll also look for examples of pieces with a Mobius strip, as I'd like to have a go at including one in my own work.
Wednesday 3 October 2007
Model icebreaker
The evening classes have started again! To get us into the swing of things again, we had an icebreaker session. Each of us had to make a model (from card, foam, wire etc.) of a piece of jewellery for another member of the class. Someone that we didn't already know. The idea was to find out a little about the other person and then make something personalised to their interests. It worked very well, with a remarkable collection of colourful models produced by the end of the evening. Everyone managed to explain why their item was so suitable too. Apart from getting us talking to each other, the aim of the exercise was to encourage us to make models and try things out before launching into production.
We got our project briefs too. Previously we've had just one brief at a time, but this time there are two. One to make something and one to design something. More about these in a later post.
We got our project briefs too. Previously we've had just one brief at a time, but this time there are two. One to make something and one to design something. More about these in a later post.
Monday 1 October 2007
Tumbled blue glass and silver box chain earrings
 I made these earrings earlier this year, as part of the Level 2 Found Objects project in the class. There is a larger picture on flickr. I was motivated by the beautiful items others have made from sea and beach glass: see my earlier post for links to three websites in this area.
As I didn't have any genuine sea/beach glass, I made my own tumbled glass in a rock tumbler, using pieces from a blue glass bottle. This generated lots of attractive bits of glass, which should keep me going for a while! The earrings are made from two similarly shaped pieces of glass. These were chosen after the random bottle smashing and tumbling; they were not cut to shape in advance. The holes were made using a Dremel with a 1.5 mm diamond drill bit, in water, very slowly, with eye protection and with a great deal of care. Advice on how to use a diamond drill bit can be found here.
The glass pieces are hung from short lengths of box chain, made from 0.8 mm diameter silver wire. I had made these during the preceding Level 2 project, Chainmaking, Links and Units.
I had a look for genuine sea glass when walking on beaches during the summer, but was disappointed with what I found. There was very little, and what I did see looked as if it had been left on the beach the previous week, with very little smoothing apparent.
[Edit: A tutorial about how I went about tumbling the bottle glass is now available].
Subscribe to:
Posts (Atom)


